I have a confession. When the Camera Control button first appeared on the iPhone 16 Pro, I hated it. It felt like a solution looking for a problem. I kept squeezing it by accident. The menus felt clunky.
I gave up and went back to using the touchscreen.
Then the iPhone 17 Pro Max arrived. I almost ignored the button entirely. But a few weeks ago, I missed a shot of my dog running through a pile of leaves. I swore I would finally figure this thing out.
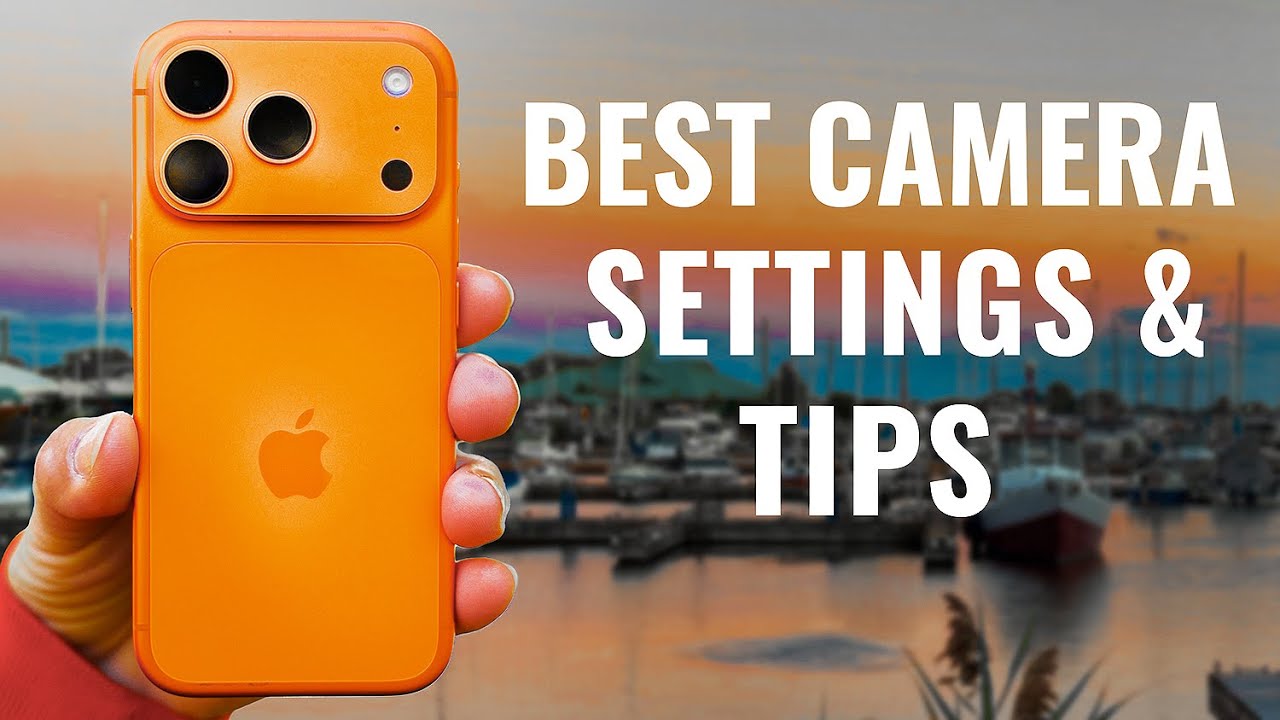
How to Customize iPhone 17 Pro Camera Control for Faster Shooting?
After diving into the best settings for iPhone 17 Pro Max, I realized I was wrong. The Camera Control is a game-changer. You just have to set it up correctly.
Here is exactly how to customize it. I will share the honest pros and cons, the specific settings I use, and the mistakes you should avoid. Let's turn that button into your new best friend.
Why Physical Buttons Beat Touchscreens?
Touchscreens are great. But they have a major flaw. You have to look at them.
When you are trying to get the best video settings for iPhone 17 Pro Max or catch a fast-moving subject, you cannot waste time tapping a screen. You need a physical trigger.
The Camera Control is a dedicated button. It sits right on the lower right side. Your finger naturally rests there. It feels like a real camera shutter.
The magic, however, is hidden in the settings. Out of the box, the button is too sensitive. It tries to do too much. We need to simplify it.
Setting Up the Camera Control for Speed
If you want faster shooting, you need to eliminate friction. Here is how to set up the iPhone 17 Pro camera settings for best quality while keeping speed a priority.
1. Switch to Double-Click
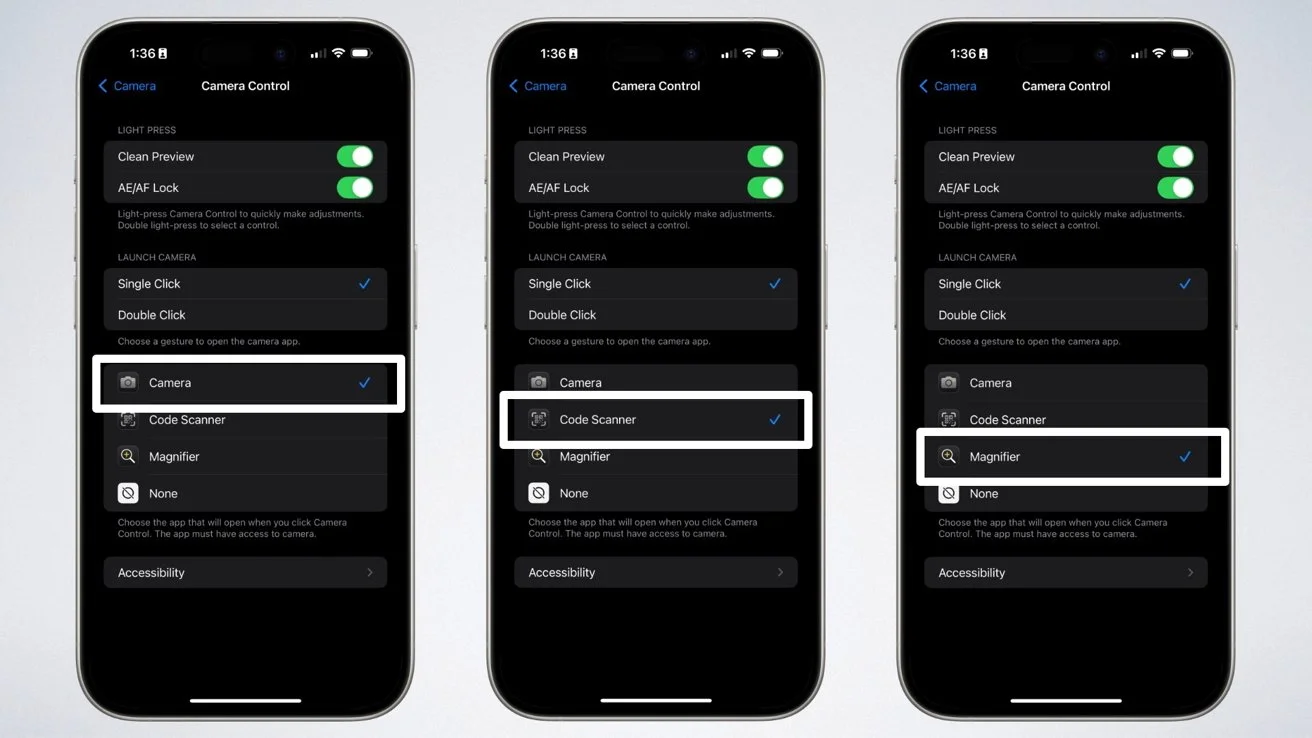
I trigger the camera by accident constantly. To fix this, go to Settings > Camera > Camera Control.
Change the action from "Single Click" to "Double Click" . This means you tap the button twice to open the camera.
Is it slower? Technically, yes. But it is only half a second slower. The trade-off is that you stop taking photos of the inside of your pocket. It is worth it.
2. Turn Off the Annoying Swipe
Here is the biggest issue. By default, a light press changes the zoom. You brush the button, and suddenly you are zoomed in to 5x. It is frustrating.
Apple fixed this in iOS 26. Go to the same Camera Control menu. Tap Customize.
-
Turn OFF the "Swipe" gesture.
-
Keep "Light Press" on .
Now, swiping does nothing. You have to deliberately press lightly to bring up the menu. This single change made me go from hating the button to loving it.
3. Reduce the Clutter (Fewer is Better)
You can cycle through six different controls. Do not use all six. It takes too long.
I only use three:
-
Exposure (To make the image brighter or darker).
-
Zoom (To get closer).
-
Styles (To change the color mood).
Go into the Customize menu. Uncheck Depth, Tone, and Cameras. Keep it simple. When you double light-press the button now, you only scroll through the tools you actually use.
Go-To Camera Settings for the iPhone 17 Pro Max
The button is useless if the camera itself is set up wrong. You need to dial in your image quality first.
You Must Also Like: Fixing Video Flicker with PAL Settings on iPhone 17 Guide
The "24MP" Secret
Open Settings > Camera > Formats.
You will see an option for "24MP Capture." Turn this ON.
By default, the phone takes 12MP photos to save space. But the sensor can do 48MP. 24MP is the sweet spot. It gives you sharp, detailed images without the massive file sizes of ProRAW.
You get twice the detail of the default setting. Do not skip this.
Prioritize Speed
Scroll down in the Camera settings. Find "Priority for Fast Shooting".
Turn this on.
Normally, the camera takes a second to process a photo. It merges multiple exposures. That is great for quality. But if you are shooting a basketball game or a toddler, that second costs you the shot.
This setting tells the phone to snap the picture now and worry about the processing later.
The trade-off: In very dark rooms, the photo might have a tiny bit more noise. But for 99% of users, the speed is worth the trade-off.
How to Adjust Settings Without Looking?
This is where the best settings for iPhone 17 Pro Max shine. Once your button is set up, you can adjust exposure without taking your eye off the subject.
Here is the muscle memory you need to build:
-
Double-click the button to open the camera.
-
Lightly press (don't click hard) the button twice quickly. The menu appears.
-
Slide your finger (left or right) to choose a tool, like Exposure.
-
Slide up and down to change the value.
Want to lock the focus so it doesn't hunt around?
While looking at your subject, press and hold the Camera Control button firmly. You will feel a little haptic tap. The text "AE/AF Lock" appears on the screen. Now you can recompose the shot, and the focus stays exactly where you put it.
The Best Video Settings for iPhone 17 Pro Max
Video is where this phone dominates. The A19 Pro chip handles heat much better than older models.
Resolution and Frames
Open Settings > Camera > Record Video.
Select 4K at 60 fps.
Why? 60 frames per second gives you smooth, realistic motion. If you want that "cinematic" movie look (which is slightly blurrier), use 24fps. But for action, 60fps is king.
Action Mode
If you are running after a pet or shooting from a car, enable Action Mode.
It crops the image slightly, but it stabilizes the footage like you are using a gimbal. It is genuinely magic.
Lock the Camera
Go back to the main Camera settings. Scroll to "Lock Camera".
Turn ON "Lock White Balance." This stops the color from changing as you move the phone. If you walk from a bright room into a dark one, the color stays consistent. This makes editing your videos ten times easier.
Real-World Use Cases (Where It Wins vs. Loses)?
Let’s be real. This button is not for everyone. Here is who benefits the most.
Best for:
-
Parents: You need to snap a picture of a kid blowing out candles now. Double-click and shoot.
-
Travelers: You want to use Visual Intelligence. Hold the button to identify a landmark or translate a menu instantly .
-
Street Photographers: You can shoot from the hip without looking at the screen. It is discreet.
Not great for:
-
Architecture photographers: You have time to set up a tripod. Just use the touchscreen.
-
Selfie takers: The button is on the right side. It is hard to reach when flipping the phone around.
A Note on Older iPhones (iPhone 15 vs. 17)
If you are reading this and still using an iPhone 15, you do not have this button. You have the Action Button. To get similar speed on the iPhone 15 camera settings for best quality, set your Action Button to open the Camera app.
You still get the speed, but you lose the zoom slider and the light press controls. That is the biggest reason to upgrade to the 17 series. The physical zoom control is a massive upgrade.
Conclusion: Stop Fighting the Future
The Camera Control on the iPhone 17 Pro Max is not perfect. But after tweaking these settings, it is incredibly useful.
To summarize the best settings for iPhone 17 Pro Max for faster shooting:
-
Settings > Camera > Camera Control: Set to Double-Click. Turn off Swipe.
-
Settings > Camera > Formats: Enable 24MP Capture.
-
Settings > Camera: Turn on Priority for Fast Shooting.
-
Practice: Light press twice to zoom, hold to lock focus.
It took me a year to give this button a real chance. Do not make my mistake. Spend ten minutes setting it up today. The next time a perfect moment appears, you will be ready. You won't even have to look at the screen.
This article provides comprehensive insights about How to Customize iPhone 17 Pro Camera Control for Faster Shooting?. Bookmark this page for future reference!